
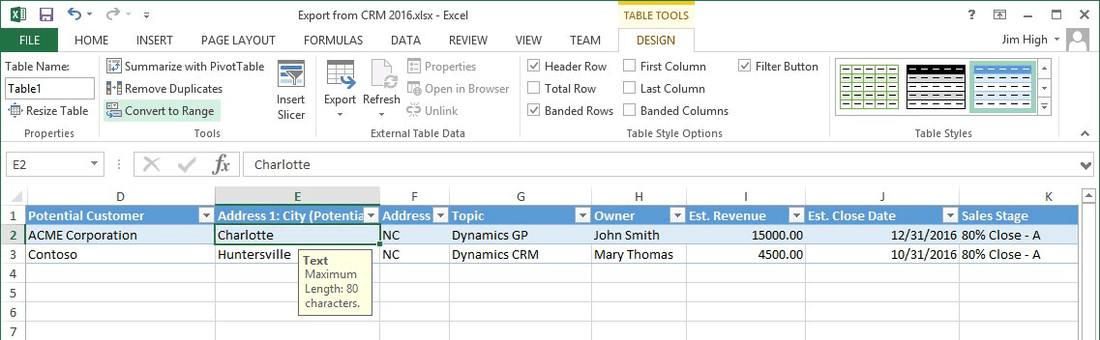
Dealing with data exported from Dynamics CRM 2016 into Microsoft Excel can sometimes be a double-edged sword. While the added formatting brings advantages, it can also lead to frustration, particularly if you’re not accustomed to working with this kind of formatted table.
For those of us who are enthusiastic about Excel and frequently manage substantial amounts of data imported from Microsoft Dynamics CRM, the challenge often lies in efficiently sorting and subtotaling this data. The new table format that comes with CRM 2016’s data export can prove advantageous for reports with predefined calculations, but it can hinder other essential functions, such as Subtotal and Sort.
In this guide, we’ll walk you through the process of sorting and subtotaling your CRM 2016 data in Excel, by addressing the issue of the data validation rules pop-up that can obstruct your workflow. Whether you’re new to working with Excel tables or simply navigating through exported CRM data, this guide will help you streamline your experience and eliminate unnecessary obstacles.
Sorting and Subtotaling CRM 2016 Data in Excel: A Step-by-Step Guide
If you’re someone who frequently deals with substantial amounts of data exported from Microsoft Dynamics CRM into Excel, you’re likely aware of the potential challenges when it comes to sorting and obtaining subtotals. While CRM 2016’s upgrade to exporting data in a table format offers advantages in predefined calculations and reporting, it can limit your ability to utilize functions like Subtotal and Sort within Excel. This guide will take you through the process of efficiently sorting and subtotaling your CRM data within Excel.
Step 1: Convert Table Formatting
- Open your exported CRM data in Excel.
- Click on any cell within the table.
- Navigate to the “Design” tab in the Excel ribbon.
Step 2: Convert to Range
- Within the “Design” tab, locate and click the “Convert to Range” button. This will strip away the table formatting and enable you to use Excel’s sorting and subtotaling functions.
One additional annoyance can occur even after converting your data to the range, which is clicking on a cell in your exported dataset. By default every time you click on a cell in that range, it will show you the data validation rules. The problem is that sometimes it covers up the information you’re trying to view in adjacent cells shown below. It may also prevent you from entering data in those fields if you are doing some Excel manipulation.
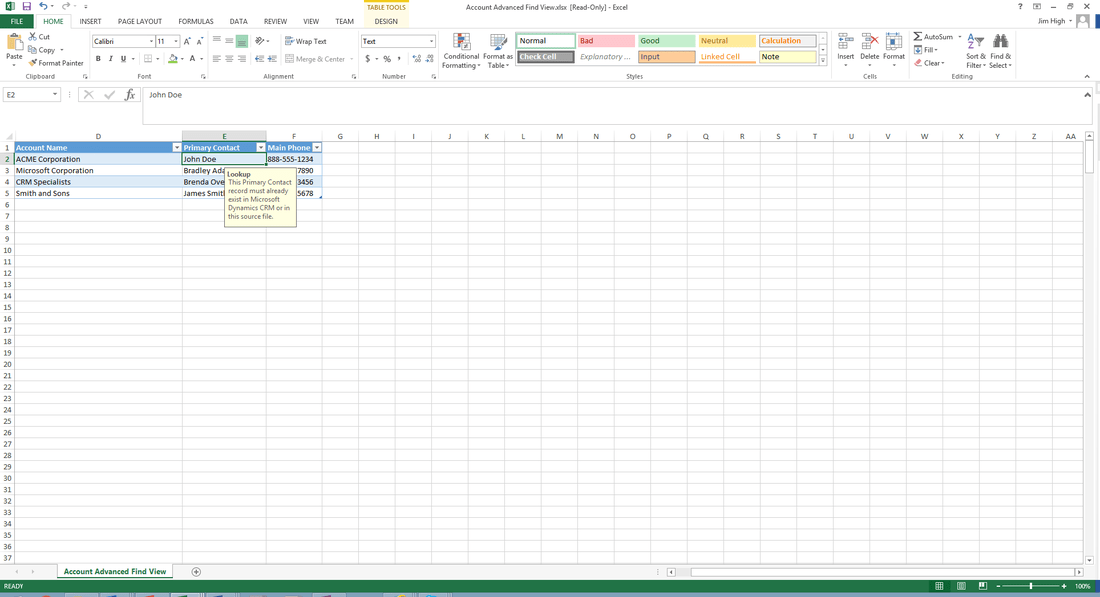
Fortunately, there is an easy resolution.
Step 3: Eliminate Data Validation Pop-ups
- Select all cells within the Excel worksheet to ensure the resolution affects the entire spreadsheet.
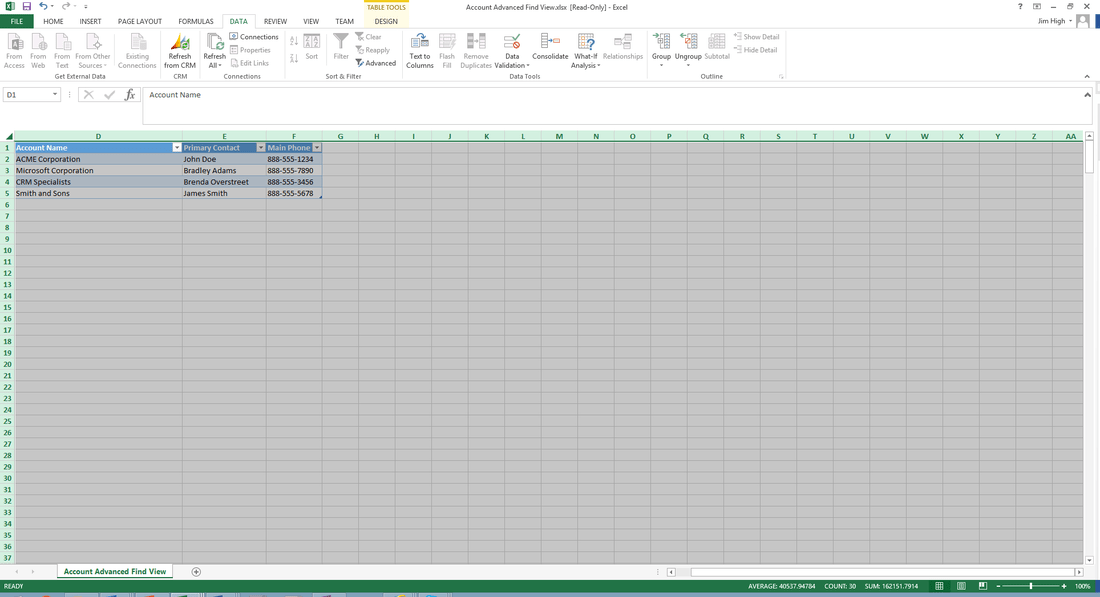
- Move to the “Data” tab in your Excel ribbon bar.
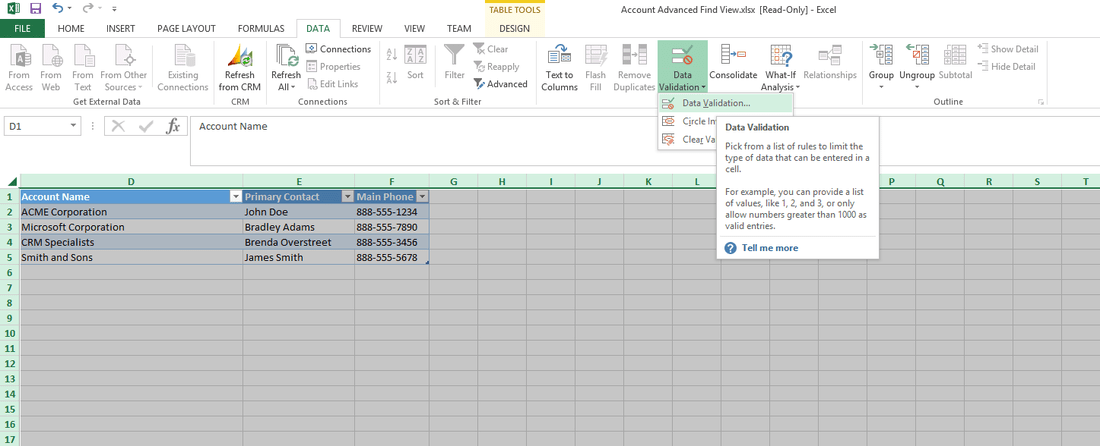
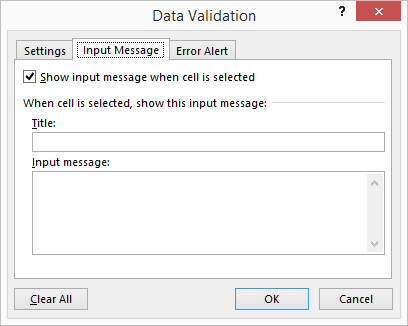
Step 4: Access Data Validation Settings
- Within the “Data” tab, click on the “Data Validation” drop-down menu, then select “Data Validation…”
Step 5: Handle Validation Types Warning
In most cases, you’ll get a warning saying the selection contains more than one type of validation. That’s fine since we want to affect them all anyway so click “Ok.” If you don’t want to remove them all, then hit “Cancel” and change your cell selection first.

Step 6: Adjust Validation Settings
The Data Validation window will appear, presenting you with two options:
- To hide input messages when a cell is selected, uncheck the “Show input messages when a cell is selected” option.
- To entirely remove validation and gain full control of the worksheet, click the “Clear All” button located at the bottom left corner of the window.
After making your desired adjustments, click “OK” to close the Data Validation window.
By following these steps, you’ll have successfully removed the data validation pop-ups that might hinder your data exploration and manipulation. It’s important to note that proper cell selection is crucial; ensuring you select the entire worksheet guarantees the changes apply to all cells. With this knowledge, you’re now equipped to efficiently sort and subtotal your CRM 2016 data in Excel, enhancing your data analysis and reporting capabilities. Happy exporting!